Complete Guide to Kitchen Sink Splash Guards for Wall Protection
The kitchen is often called the heart of the home. It’s a hub of activity where we prepare meals, wash dishes, and spend time with family. However, all that use can take a toll on your kitchen walls and backsplashes. Water splashing from the sink can cause water damage, stains, mold, and mildew buildup. Protecting the walls behind your kitchen sink should be a top priority.
Kitchen sink splash guards are an easy and affordable way to protect your backsplash, drywall, or painted walls from water damage. In this comprehensive guide, we’ll explore everything you need to know about choosing, installing, and caring for sink splash guards so you can keep your kitchen walls looking fresh and clean.
What is a Kitchen Sink Splash Guard?
A kitchen sink splash guard is a panel installed behind a sink to prevent water from splashing onto walls. It’s also called a sink backsplash guard or sink wall protector.
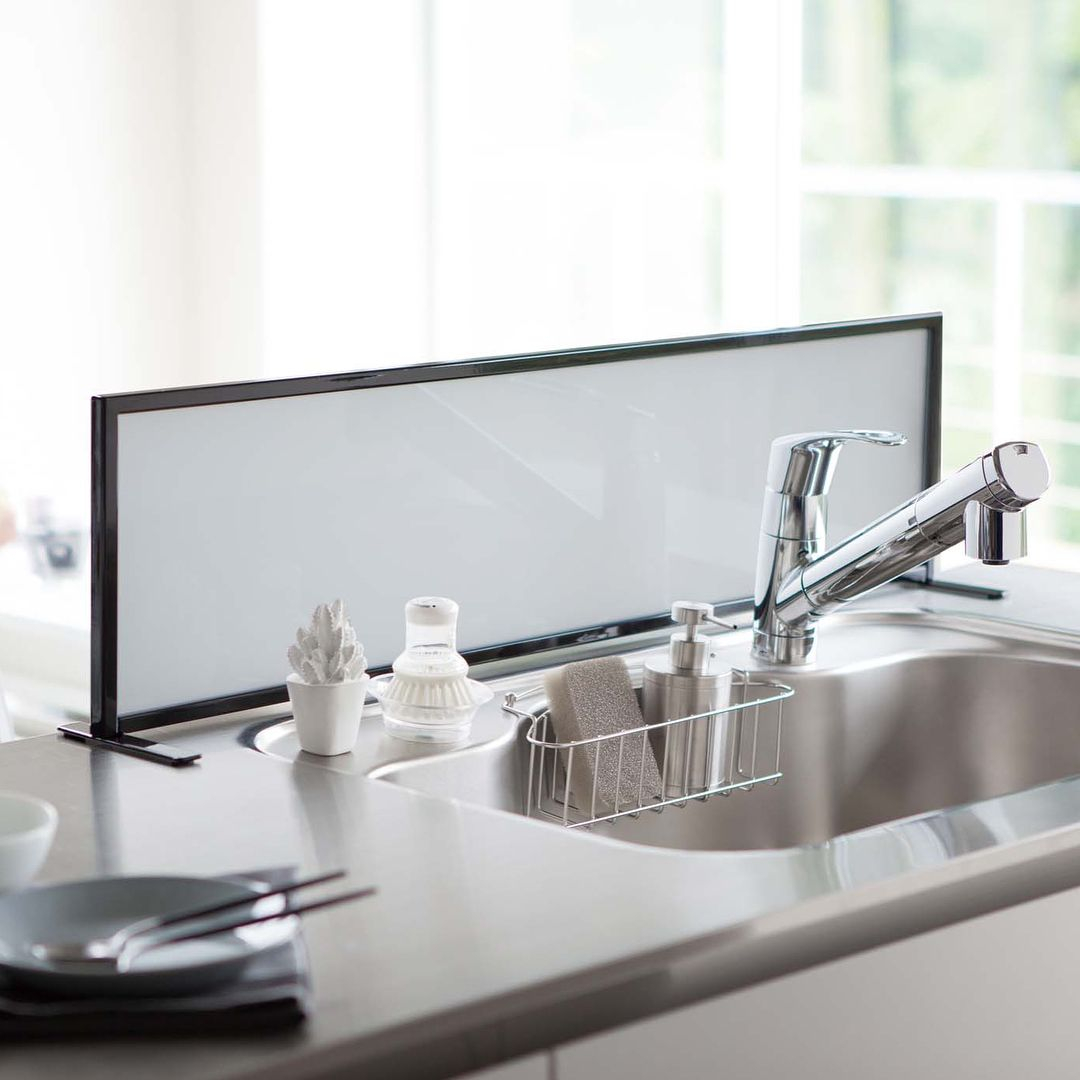
Splash guards are typically made of moisture-resistant materials like stainless steel, tempered glass, acrylic, or plastic. The guard fits tightly to the wall behind the sink basin and redirects any errant water back down into the sink.
Why You Need a Splash Guard for Your Sink
There are several reasons why a kitchen sink splash guard is a useful accessory:
- Protect walls from water damage – Splashing water can ruin drywall, cause stains, and promote mold growth.
- Preserve backsplashes – Splash guards prevent erosion of grout and degradation of backsplash tiles.
- Reduce noise – Guards dampen the sound of dishes and water splashing in the sink.
- Improve safety – Guards create a barrier so items don’t fall behind the sink.
For most homeowners, protecting walls is the top reason to install splash guards. Even a well-sealed backsplash can fail over time, allowing moisture penetration. With regular use, water damage is inevitable without a guard.
Types of Kitchen Sink Splash Guards
There are several design options when shopping for sink splash guards:
Full Backsplash
As the name implies, these guards cover the entire backsplash area behind the sink. Full backsplash guards are available in stainless steel, tempered glass, and plastic.
Partial Backsplash
Partial backsplash guards only protect the section directly behind the sink basin. They leave upper areas of the backsplash exposed. Partial guards allow you to add protection without completely covering an attractive backsplash.
Undermount
For undermount sinks, splash guards slide into place between the sink and wall. Undermount guards have a low profile for a seamless appearance.
Self-Adhesive
Self-adhesive guards stick directly to the wall without hardware. Great for rental units or temporary protection. Look for guards with peel-and-stick waterproof adhesive.
How to Choose the Right Kitchen Splash Guard
Selecting the ideal sink splash guard for your kitchen depends on several factors:
Measure Your Sink
Getting accurate measurements of your sink location is crucial. Note the width and height of the backsplash area requiring protection. This ensures proper coverage and fit.
Material
Common splash guard materials include:
- Stainless steel – Durable, easy to clean, and heat resistant. Provides a modern look.
- Tempered glass – Sleek transparency. Glass guards are scratch-resistant.
- Acrylic -budget-friendly option that is easy to cut to size. Not heat or scratch resistant.
- Plastic – Affordable and waterproof but less durable over time.
Finish and Color
Splash guards come in various colors and finishes. Choose a neutral stainless steel or a bold pop of color. Or match your existing fixtures for a cohesive look. Consider heat resistance if behind a cooking surface.
Ease of Cleaning
Guards that are simple to wipe down will make maintenance easy. Avoid textured surfaces that trap grime. Smooth materials like glass and stainless steel clean up nicely.
Style
Opt for full, partial, or undermount guards to suit your needs. Make sure to get the right size and shape for full coverage.
How to Install a Kitchen Sink Splash Guard
Most kitchen splash guards follow a straightforward installation process:
Step 1 – Clean the Mounting Area
Use soap and water to thoroughly clean the backsplash surface where the guard will attach. Make sure the area is free of grime, grease, and debris so the guard sticks properly.
Step 2 – Measure and Cut to Size
For custom sizing, measure the backsplash area and mark cutting lines on the guard. Cut the guard to size using tin snips or a hacksaw.
Step 3 – Apply Adhesive
For self-adhesive guards, peel away the backing and press onto the surface. For hardware-mounted guards, apply caulk or construction adhesive to the back side.
Step 4 – Secure the Splash Guard
Carefully align the guard and press into place. For screw-mounted guards, drill pilot holes and insert screws. Follow any product-specific mounting instructions.
Step 5 – Seal the Edges
Run a bead of waterproof silicone caulk along all edges and joints. Smooth the caulk with a fingertip for a watertight seal.
That’s all it takes to install most standard splash guards in about 30 minutes. Now you can contain splashes without damaging walls.
Benefits of Using a Kitchen Splash Guard
Adding a splash guard behind your sink provides several advantages:
Keeps Your Kitchen Clean
Guards prevent water, grime, and debris from accumulating on walls. This makes cleaning the kitchen faster since you don’t have to scrub the walls.
Prevents Water Damage
By diverting water into the sink, guards protect vulnerable drywall and backsplashes from stains, delamination, and mold.
Reduces Noise
The barrier helps muffle sounds from the sink. Guards dampen noises from running water and washing dishes.
Improves Safety
Tempered glass and steel guards prevent items from disappearing down the gap between the sink and wall.
FAQs about Kitchen Sink Splash Guards
Here are answers to some frequently asked questions about sink splash guards:
What are the Different Materials Used for Splash Guards?
Common materials are stainless steel, tempered glass, acrylic, and plastic. Each has pros and cons. Stainless steel is the most durable option but also the most expensive.
How Long Does a Splash Guard Last?
With proper installation and care, quality splash guards can last 5-10 years or more. Guards made from long-lasting materials like steel and glass have the longest lifespan.
How Do I Clean a Kitchen Splash Guard?
Use a soft sponge or microfiber cloth with warm, soapy water. Avoid abrasive cleaners or scouring pads. Thoroughly dry the surface after cleaning to prevent water spots.
Protect Your Kitchen Walls with a Splash Guard
Installing a kitchen sink splash guard is a simple and worthwhile upgrade. Properly containing water splashes will keep your walls looking like new for years. With a variety of styles to choose from, you can find the perfect fit for your space and decor.
The right splash guard will preserve your backsplash, reduce noise, and improve safety. Follow our tips on choosing materials and sizing. With simple tools and caulk, DIY installation is straightforward. Investing in a quality kitchen sink splash guard will pay dividends through added protection and easier cleaning.
With your newfound knowledge, you can shop for guards with confidence. Protecting the walls around your hardworking kitchen sink is easy and affordable. Keep your kitchen looking pristine and enjoy peace of mind by adding a water-tight splash guard today.